Following are the step-by-step instructions on how to install and use our Darkroom Booth Greenscreen “Mix and Match” Template.
There are 4 sections to this installation:
- Installation
- Enabling the template for an Event
- Replacing the photos on Screen images
- Replacing the photos on Layout images
INSTALLATION
- Download the compressed file from our website
- Extract the compressed file which will create a folder with the same name
- Double click the extracted folder and there should be 2 .exe files inside it

- Double click Install_Screen.exe and accept all defaults
- Double click Install_Templates.exe and accept all defaults
- Open Darkroom Booth
- To verify that everything installed properly, open Windows Explorer then
- navigate to X:\BoothScreens and verify that the file PBA_GS_MixMatch.xbdr exist
- navigate to X:\BoothTemplates and verify that the files PBA_GS_MixMatch_1Photo_Template.xbdr and PBA_GS_MixMatch_3Strip_Template.xbdr exist.
- If all files are there, you have successfully completed the installation and may proceed to the next section. If not, contact info@photoboothaddons.com for assistance.
USING THE TEMPLATE
- Create an Event in Darkroom Booth
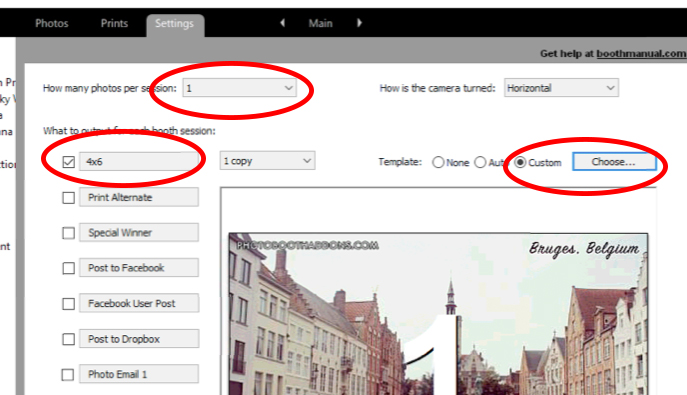
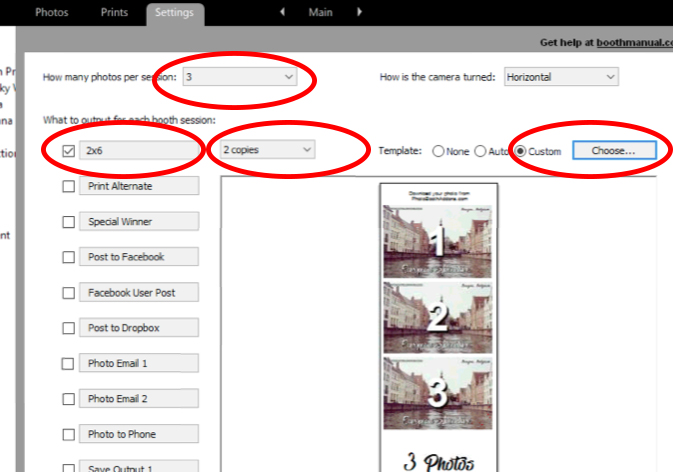
[NOTE] This template comes with 2 layouts (1 photo 4″x6″ postcard and 3 photos 2″x6″ strip). Depending on which layout you will use, your basic options in the Main tab would look similar to these
1 photo 4″x6″ postcard
For this Template, choose PBA_GS_MixMatch_1Photo_Template.xbdr
3 photos 2″x6″ strips
For this Template, choose PBA_GS_MixMatch_3Strip_Template.xbdr
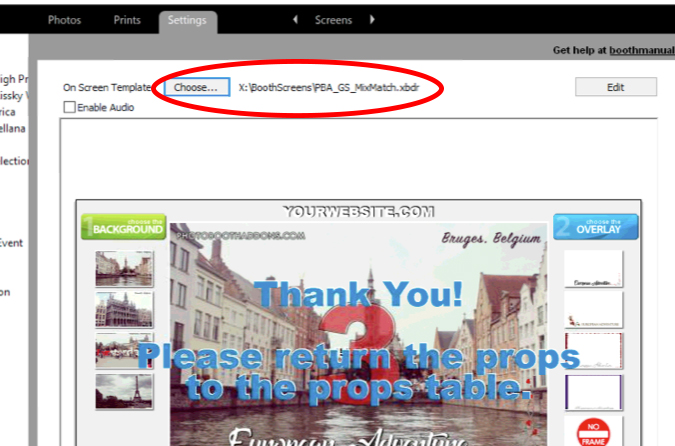
- Go to the Screens tab and choose the PBA_GS_MixMatch.xbdr template
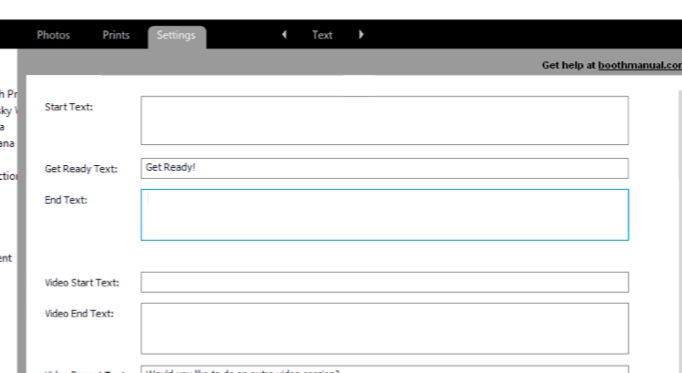
- Go to the Text tab and clear the entry for Start Text and End Text (example below)
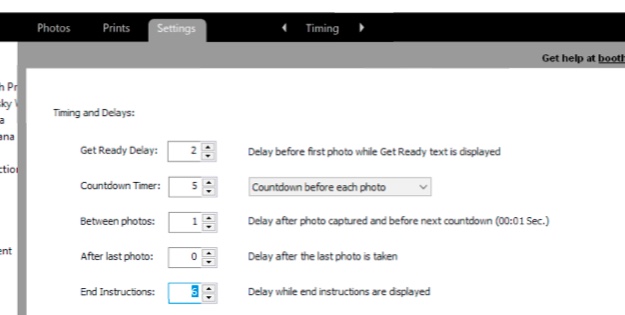
- Go to the Timing tab, below are example timing that works for us. You would have to experiment to see what works best for you and your audience.
- Go to the Liveview tab, below are example of our settings. This would vary depending on your preference but we recommend to have the “When to show liveview window: Always on before and during session“
REPLACE THE PHOTOS ON THE SCREEN TEMPLATE
- Go to the Screens tab then click Edit
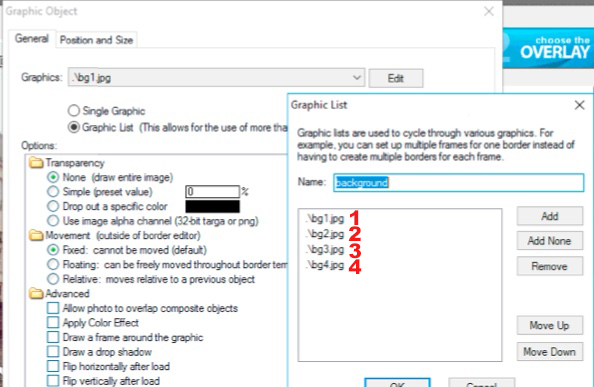
[RECOMMENDATION] To simplify this process, please name your images bg1.jpg for background 1, bg2.jpg for background 2, etc… Same recommendation applies with the foreground/overlay, fg1.png for foreground 1, fg2.png for foreground 2, etc…
- Make the following changes
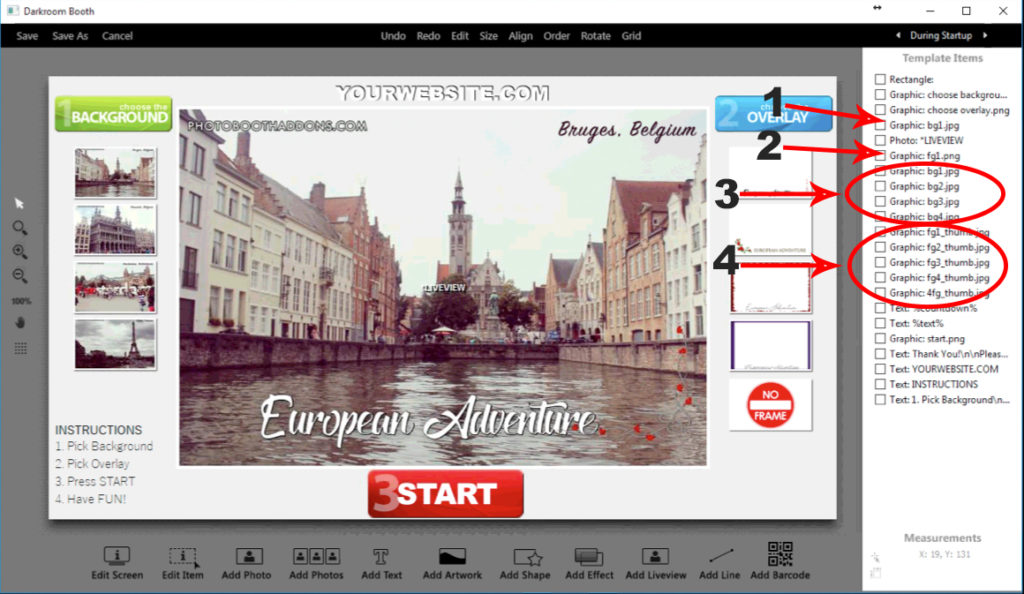
1. Change the Liveview background photos
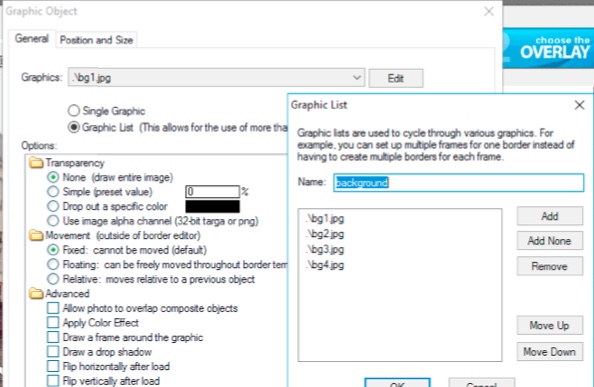
- Double click Graphic: bg1.png
- Click Edit
- Remove sample images
- Add each of your images and should look something similar to this Graphic list (note the order of the filenames)
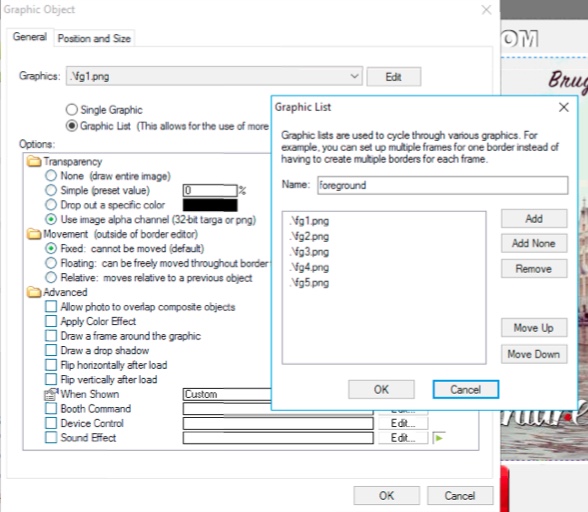
2. Change the Liveview foreground photos
- Double click Graphic: fg1.png
- Click Edit
- Remove sample images
- Add each of your images and should look something similar to this Graphic List (note the order of the filenames)
[NOTE] fg5.png is just a blank png file with a tiny unnoticeable dot.
3. Change each background thumbnails by double clicking each image on the list (Graphic: bg1.jpg, Graphic: bg2.jpg, ect.)
- Click Browse to upload your image
- Scroll down to Booth Command and make sure that the foreground number at the end correspond to the order on the Graphic list
![]()
- Repeat for each background images
4. Change each foreground thumbnails by double clicking each image on the list (Graphic: fg1.png, Graphic: fg2.png, ect.)
- Click Browse to upload your image
- Scroll down to Booth Command and make sure that the background number at the end correspond to the order on the Graphic list
![]()

- Repeat for each foreground images
- Finally, Save (or Save As) the Screen Template
REPLACE THE PHOTOS ON THE LAYOUT TEMPLATE
[NOTE] I will only be going over 1 photo 4″x6″ layout on this instruction since the concept is the same for multiple photos.
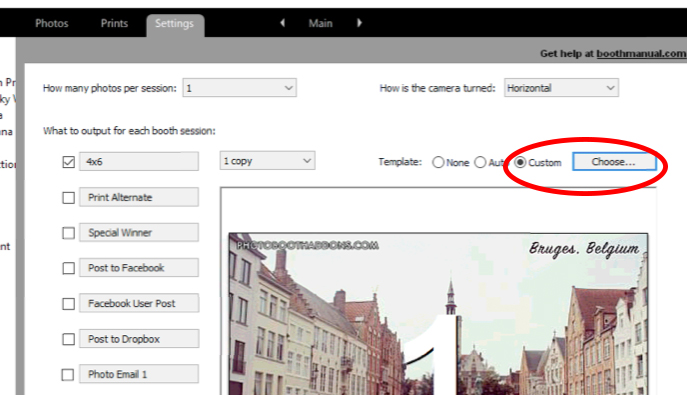
- Go to the Main tab then click Choose
- Left click once to select PBA_GS_MixMatch_1Photo_Template.xbdr then click Edit
- Make the following changes
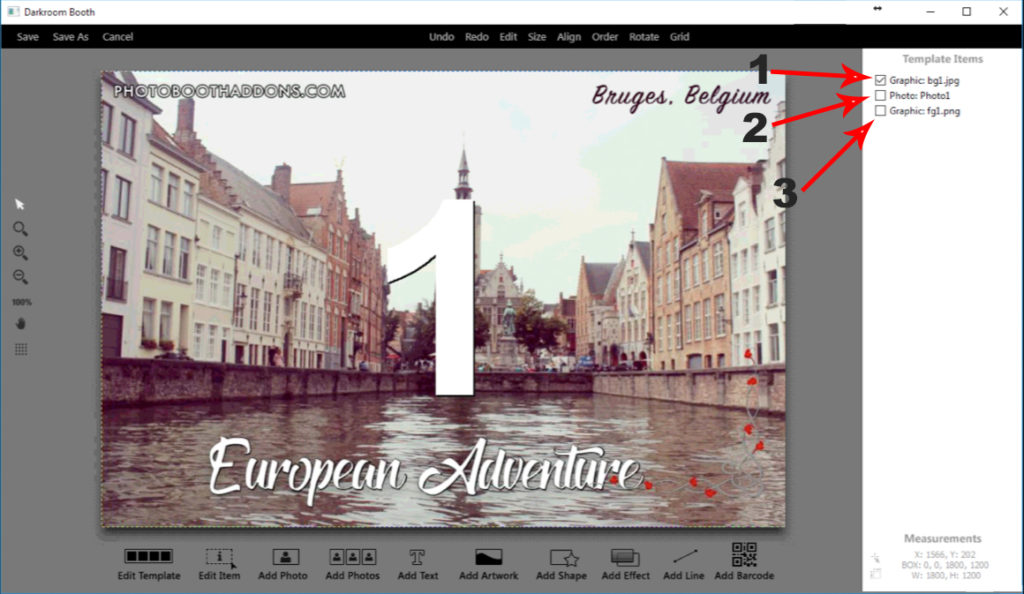
- Change the background photos
- Double click Graphic: bfg1.jpg
- Click Edit
- Remove sample images
- Add each of your images and should look something similar to this Graphic List (note the order of the filenames)
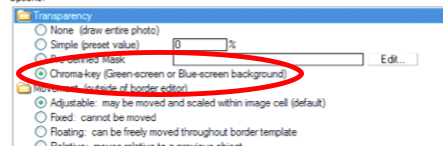
2. Set photo to Chroma-key
Double click Photo: Photo1: Photo1 and verify that Chroma-key is selected under Transparency
3. Change the foreground photos
- Double click Graphic: fg1.png
- Click Edit
- Remove sample images
- Add each of your images and should look something similar to this Graphic List (note the order of the filenames)
[NOTE] fg5.png is just a blank png file with a tiny unnoticeable dot.
- Finally, Save (or Save As) the Layout Template
- Now you’re ready to use Mix and Match Greenscreen template with your Darkroom Booth.
VIDEO INSTRUCTION
[WATCH IN HD]
For questions or further assistance, please send an email to info@photoboothaddons.com
Comments are closed.